The most important component of the design of any residential and non -residential premises are the doors. In order to avoid malfunctions and installation errors, the master must know certain nuances. This article proposes practical advice and basic recommendations for the independent installation of the door in the box.
So, instructions:
1. The first stage of the door installation is the installation of the door frame. This detail is characteristic of both interior and input. This stage is the most responsible because it affects the further work of the door.
2. You need to take a finished door frame. Insert the part into the prepared doorway. Next, you will need to centrize and level the box by level. You will need certain chasing products.
3. If necessary, between the wall and the door box you will need to put the bars, the required size. Know the wedge. Further, in each of the racks of the box, it will be necessary to drill 3 holes so that the same openings are formed on the wall and in the box. Now take off the box.
4. At this stage, you will need to drill large holes in the wall for dowels in places of holes. Then insert the dowel and centrize the box in the wall opening.
5. With long self -tapping screws, fix the box on the wall so that the hats are drowned in wood. With special caps in the color of the door, close the hats of self -tapping screws.
6. Next, you need to measure the distance from the floor of the beginning of the door itself. The result should be at least one centimeter. Cut the fittings that includes a pen, loops and lock. It’s time to put the door to the box.
7. It should be noted the distance for the lock and loops. Make holes in the doorbox according to the marks. Next, put and fix the loops with self -tapping screws.
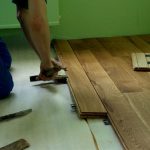
8. To check the correctness of the door installation, it needs to be turned in one and the other. After inserting the door, you will have to fill the openings between the box and the wall with foam, as well as install the platband.